The config.yml file
Before starting this application, you may want to configure some values that are
evaluated during the initialization process of Portus. All these values are
specified in the config/config.yml file. This file contains the default values
for each setting, and you should never touch it. If you want to modify some of
its values you have two options: creating a config/config-local.yml file with
the values that you override the default ones, or to use environment
variables. For example, imagine the following situation:
# In config.yml
settings:
  a: true
  b: false

# In config-local.yml
settings:
  a: false
The result of the previous example is that both a and b are false.
In containerized deployments though, environment variables are usually more convenient. Let’s imagine the following configuration:
feature:
  enabled: true
  value: "val"
In Portus we follow a naming convention for environment variables: first of
all we have the PORTUS_ prefix, and then we add each key in uppercase. So, for
example, the previous example can be tweaked by setting:
PORTUS_FEATURE_ENABLED and PORTUS_FEATURE_VALUE.
Note that environment variables override even values from the config-local.yml
file. So, to sum this up, you can assume that Portus follows the following
preference when reading a configuration value (listed from max. preference to
least):
- Environment variables.
- The user-defined
config-local.ymlfile. - The default values from the
config.ymlfile.
Last but not least, some of these configuration values are quite delicate. This is why you should manage them with secrets, as explained here.
List of configuration options
Email configuration
email:
  from: "portus@example.com"
  name: "Portus"
  reply_to: ""

  smtp:
    enabled: false
    address: "smtp.example.com"
    port:    587,
    domain:  "example.com"

    ##
    # SSL.

    ssl_tls:              ""
    enable_starttls_auto: false
    openssl_verify_mode:  "none"
    ca_path:              ""
    ca_file:              ""

    ##
    # Authentication

    user_name:      ""
    password:       ""
    authentication: "login"
There are some important things to note from SMTP support:
- If SMTP is disabled, then
sendmailis used instead (the specific command being:/usr/sbin/sendmail -i -t). - Most options described here have a direct translation in ActiveMailer::Base, which is the mailer used by Portus. If you go over the “Configuration options” section, you will start to see the same keys as in the Portus configuration, and their documentation.
- The
ssl_tlskey is a combination of thessland thetlsoptions as described in the documentation of ActiveMailer::Base. If you don’t want SSL support, then simply leave this option empty. Otherwise, you will have to write either “ssl” or “tls” to enable any of these options. Moreover,openssl_verify_modeaccepts only two values: “none” (the default), or “peer”. Again, refer to the same documentation for more info. - Authentication is only enabled if you provide a
user_name. Moreover, note that the password that you have to write might be different than the one you have on your personal account (e.g. some providers like GMail ask you to create application passwords if you are using two-factor authentication). Last but not least,authenticationcan only have three values: “login”, “plain” or “cram_md5”. Check the documentation of ActiveMailer::Base in order to see what’s the right value for you. - Note that this configuration section will be directly mapped into options that are passed into the mailer. We are using the same mailer as many other Ruby on Rails applications, so all the examples posted on different places should also apply here. For example, Gitlab has written an awesome list which describes which options are to be used for each mail provider.
An example configuration for GMail might look like:
email:
 from: "account@gmail.com"
 name: "Name"

 smtp:
   enabled: true
   address: "smtp.gmail.com"
   port: 587,
   domain: "smtp.gmail.com"
   user_name: "account@gmail.com"
   password: "two-factor-password"
   authentication: "login"
   enable_starttls_auto: true
   openssl_verify_mode:  "none"
Gravatar
If enabled, then the profile picture will be picked from the Gravatar associated with each user. Otherwise, a default icon will be shown.
gravatar:
  enabled: true
Delete support
Note: bear in mind that this will only work accordingly if you are using Docker Distribution 2.4 or later.
As of 2.1, and if you are using a Docker Distribution version not older than
2.4, you will be able to delete images, tags, users, namespaces and teams. In
order to do so just enable the delete option:
delete:
  enabled: true
  contributors: false
  garbage_collector:
    enabled: false
    older_than: 30
    keep_latest: 5
    tag: ""
This option is disabled by default. This is because we want users enabling this if they are really sure about the feature itself and its requirements. For more information, read this page.
Moreover, this action can only be performed by team owners at first. You can
change this by setting contributors to true, in which case contributors will
also be able to remove images and tags.
Last but not least, you can tell Portus to automatically remove tags which are considered old. This is documented here.
LDAP Support
If enabled, then only users of the specified LDAP server will be able to use Portus.
ldap:
  enabled: false

  hostname: "ldap_hostname"
  port: 389
  timeout: 5

  encryption:
    method: ""
    options:
      ca_file: ""
      ssl_version: "TLSv1_2"

  base: ""
  admin_base: ""
  filter: ""
  uid: "uid"

  authentication:
    enabled: false
    bind_dn: ""
    password: ""

  guess_email:
    enabled: false
    attr: ""
Some notes:
- base: The base where users are located (e.g. “ou=users,dc=example,dc=com”).
- admin_base: The base where admin users are located. (e.g. “ou=admin,dc=example,dc=com”). Use this base if you have a separate route for admin users. Users logging in from this base will be considered Portus administrators automatically. Available since Portus 2.5.
- filter: This option comes in handy when you want to filter even further the results that might be hanging from the base.
- encryption
- method: The method of encryption between Portus and the LDAP server. It defaults to an empty value, which means that the communication won’t be encrypted. You can also use “simple_tls” and “starttls”.
- options: You can pass some extra options, like a path to a ca_file (by default it will use the parameters from the host), and the ssl_version.
- guess_email: Portus needs an email for each user, but there’s no standard way to get that from LDAP servers. You can tell Portus how to get the email from users registered in the LDAP server with this configurable value.
- uid: The attribute where Portus will look for the user ID when authenticating.
- authentication: Some LDAP servers require a binding user in order to
authenticate. You can specify this user by enabling this option. Then you
should provide the DN of this user in the
bind_dnvalue.
There are three possibilities for the guess_email option:
- disabled: this is the default value. It means that Portus won’t do a thing when registering LDAP users (users will be redirected to their profile page until they setup an email account).
- enabled where “attr” is empty: for this you need “ldap.base” to have some value. In this case, the hostname will be guessed from the domain component of the provided base string. For example, for the dn: “ou=users,dc=example,dc=com”, and a user named “mssola”, the resulting email is “mssola@example.com”.
- enabled where “attr” is not empty: with this you specify the attribute inside a LDIF record where the email is set.
If something goes wrong when trying to guess the email, then it just falls back to the default behavior (empty email).
Creating the first admin user
As explained here, an admin user can upgrade users to be administrators. But, how do we create the very first admin user? There are two ways in which this can be done:
first_user_admin:
  enabled: true
By default the first user to be created will be granted admin permissions. In this case, when you go to the “Sign up” page, you will find the following situation:
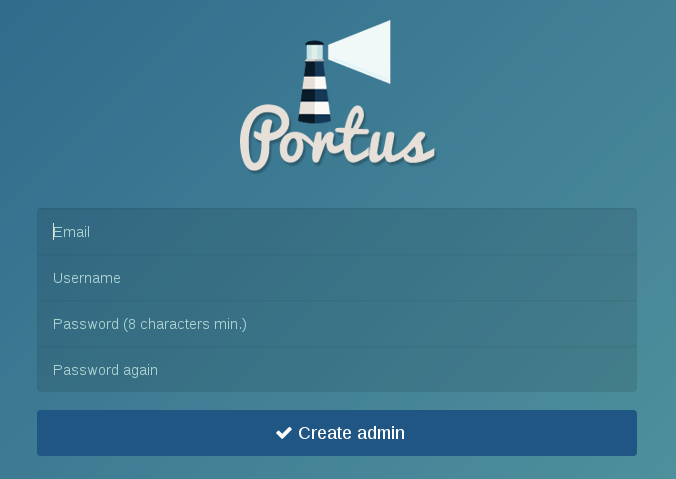
That is, the “Sign up” form is telling you that the user to be created will be an admin. Therefore, in order to create the first admin user, you just have to proceed as usual and fill the “Sign up” form for this user. After doing this, the “Sign up” form will not be able to create administrators, but only regular users.
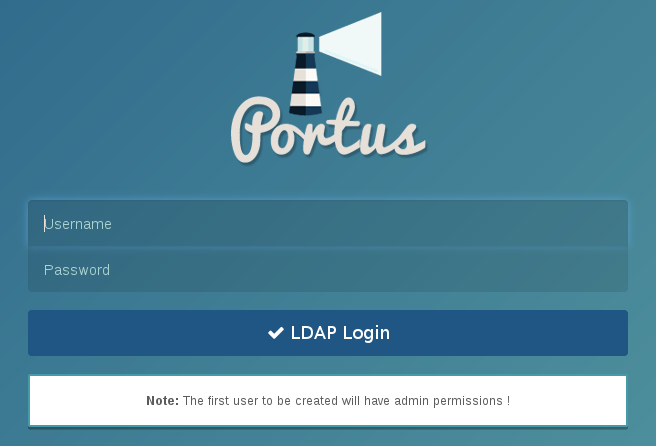
However, note if LDAP support is enabled, the first user that logs in with LDAP credentials will be automatically an admin. This is shown in the following screenshot:
The other way to do this is to disable the first_user_admin configurable
value. In this case, the first admin cannot be created from the Web UI, rather
you have to use the portus:make_admin rake task. Therefore, you should
access into the Portus application and run:
$ rake portus:make_admin[<username>]
When you are using the official Docker image, you can do this with:
$ docker exec -it <container-id> portusctl make_admin <username>
Disabling the sign up form
By default Portus will have the sign up form available for any person that comes
across your Portus instance. You can change that by disabling the signup
configuration value:
signup:
  enabled: false
This way, only the admins of this Portus instance will be able to create users in the system. This setting is completely ignored when LDAP support is enabled. This option is explained with more detail here.
Enforce SSL usage on production
By default Portus will enforce usage of SSL when ran with the “production” environment. This is required for security reasons. The behaviour is controller by this configuration setting:
check_ssl_usage:
  enabled: true
OAuth support
Note: this is only available in Portus 2.3 or later.
Portus provides OAuth support: you can configure it to support authentication from one of the supported platforms. Here is the full list:
oauth:
  local_login:
    enabled: true

  google_oauth2:
    enabled: false
    id: ""
    secret: ""
    domain: ""
    options:
      # G Suite domain. If set, then only members of the domain can sign in/up.
      # If it's empty then any google users con sign in/up.
      hd: ""

  open_id:
    enabled: false
    identifier: ""
    domain: ""

  github:
    enabled: false
    client_id: ""
    client_secret: ""
    organization: ""
    team: ""
    domain: ""

  gitlab:
    enabled: false
    application_id: ""
    secret: ""
    group: ""
    domain: ""
    server: ""

  bitbucket:
    enabled: false
    key: ""
    secret: ""
    domain: ""
    options:
      team: ""
As you can see, the only option enabled by default is local_login, which tells
Portus that users can log in with their Portus credentials. You can disable this
if you want users to only login with OAuth credentials.
All supported platforms have their own settings, but there are some common attributes that might not be evident:
- domain: if a domain (e.g. mycompany.com) is set, then only signups with emails from this domain are allowed.
- organization, group and team: this is used by providers like Github, Gitlab or Bitbucket. With this you can restrict the team or organization where the given user belongs.
- OpenID’s identifier and Gitlab’s server: these attributes enable Portus to fetch the proper source. That is, you can specify the Gitlab server (by default gitlab.com), or the OpenID provider (by default you’ll be prompted with a form asking for this information).
For more info, take a look at the dedicated page for OAuth support.
Advanced registry options
You can configure some aspects on how Portus interacts with your Docker registry:
registry:
  jwt_expiration_time:
    value: 5

  catalog_page:
    value: 100

  timeout:
    value: 2

  read_timeout:
    value: 120
The JWT token is one of the main keys in the authentication process between Portus and the registry. This token has as one of its values the expiration time of itself. The problem is that the registry does not request another token when it expires. This means that for large images, the upload might fail because it takes longer than the expiration time. You can read more about this in the issue SUSE/Portus#510.
To workaround this, we allow the admin of Portus to raise the expiration time
as required through the jwt_expiration_time configurable value. This value is
set in minutes, but we still allow the syntax as allowed before the 2.1 release
(deprecated in 2.3 and to be removed in 2.4).
Moreover, the registry might be slow or the network connection flaky. For this,
you can also use the timeout and the read_timeout values. This has been
added in Portus 2.3.
Finally, another option is the catalog_page. This tweaks the page size for
each catalog request performed by Portus. The default value for this should be
enough for the vast majority of users, but with this we allow administrators to
workaround a Docker Registry bug as stated
here.
FQDN of your machine
On the next release of Portus, the FQDN of the machine is no longer a secret and it’s now considered a configurable value. The fact that it was a secret before is because of legacy code. However, you now can configure it like this:
machine_fqdn:
  value: "portus.test.lan"
Security scanning
Note: this is only available in Portus 2.3 or later.
You can setup a security scanner for your Portus instance. This way, Portus will display whether the images you have on your registry have known security vulnerabilities. This feature is disabled by default, but it can be configured through the following values:
security:
  # CoreOS Clair support (https://github.com/coreos/clair). This is only
  # guaranteed to work for v2.0.x releases of Clair.
  clair:
    server: ""
    health_port: 6061
    timeout: 900

  # zypper-docker can be run as a server with its `serve` command. This backend
  # fetches the information as given by zypper-docker. Note that this feature
  # from zypper-docker is experimental and only available through another branch
  # than master.
  #
  # NOTE: support for this is experimental since this functionality has not
  # been merged into master yet in zypper-docker.
  zypper:
    server: ""

  # This backend is only used for testing purposes, don't use it.
  dummy:
    server: ""
Portus supports having multiple scanners enabled at the same time. You can read more about this here.
Anonymous browsing
Note: feature only available in Portus 2.3 or later.
You can configure Portus to allow anonymous users to explore public repositories. This feature is enabled by default:
anonymous_browsing:
  enabled: true
You can read more about this here.
Display name
This option tells Portus to not use the username when showing users, rather a user-defined “display name”. You can read more about this here. By default this feature is disabled, and it’s controlled with this setting:
display_name:
  enabled: false
Granular user permissions
You can further tweak the permissions that users have on a Portus instance with the following options:
user_permission:
  change_visibility:
    enabled: true

  create_team:
    enabled: true

  manage_team:
    enabled: true

  create_namespace:
    enabled: true

  manage_namespace:
    enabled: true

  create_webhook:
    enabled: true

  manage_webhook:
    enabled: true

  push_images:
policy: allow-teams- change_visibility: allow users to change the visibility or their personal namespace. If this is disabled, only an admin will be able to change this. It defaults to true.
- create/manage_team: allow users to create/modify teams if they are an owner of it. If this is disabled, only an admin will be able to do this. It defaults to true.
- create/manage_namespace: allow users to create/modify namespaces if they are an owner of it. If this is disabled, only an admin will be able to do this. It defaults to true.
- create/manage_webhook: allow users to create/modify webhooks if they are an owner of it. If this is disabled, only an admin will be able to do this. It defaults to true.
- push_images: set a push policy. Available options are:
allow-teams,allow-personalandadmin-only. You can read more about push policies here.
Background process
Note: this is only available in Portus 2.3 or later.
As explained in the documentation page of the background process, we have introduced a background process to alleviate some heavy operations from the main Portus process. This background process has its own configuration values:
background:
  registry:
    enabled: true

  sync:
    enabled: true
strategy: initial- The
security scanningtask can be disabled by not providing a server as described here. - The
registryintegration can be disabled, but it is highly discouraged since then all registry events will be missed by Portus (they will be logged, but not handled). - The
synctask can be disabled as well, but more importantly you can tune it further when enabled with thestrategyoption. This option may have any of the following values:- update-delete: it performs a full synchronization (traditional behavior
of the old
cronoprocess). - update: it only adds missing tags, but it does not remove any contents from the database.
- on-start: when starting Portus it runs an
update-deleteand then it gets disabled (i.e. it will only run once). - initial: like
on-start, but it only runs if the database is empty. This is the default value since it’s deemed to be the most common use-case and the safest option. The idea behind this option is that you only want to synchronize when bootstrapping your instance.
- update-delete: it performs a full synchronization (traditional behavior
of the old
Pagination
Note: feature only available in Portus 2.4 or later.
You can configure how pagination behaves regarding table entries and the pages
component. The limit attribute refers to the number of entries per page that
should be displayed and before_after to the number of pages to be displayed
before and after the current page in the pages component. The default values are
descibred as below:
pagination:
  limit: 10
  before_after: 2
From Portus 2.5 onwards, limit was renamed to per_page. See below:
pagination:
  per_page: 10
  before_after: 2
Deploying Portus in a Sub-URI
In some deployments it might make sense to make Portus accessible through a
Sub-URI. That is, to be able to prefix requests to Portus with a subdirectory.
In non-passenger setups, this can be accomplished by setting the
RAILS_RELATIVE_URL_ROOT environment variable. With this, you will be able to
serve Portus from the specified subdirectory.